
Infiniti Q60 Brake Pad Replacement
|
|||
|
Parts needed: Brake pads were ordered through Tunerzstore.com. Tools needed: Car jack, jack stands optional, pick or small screwdriver, brake cleaner, wire brush. |
|||
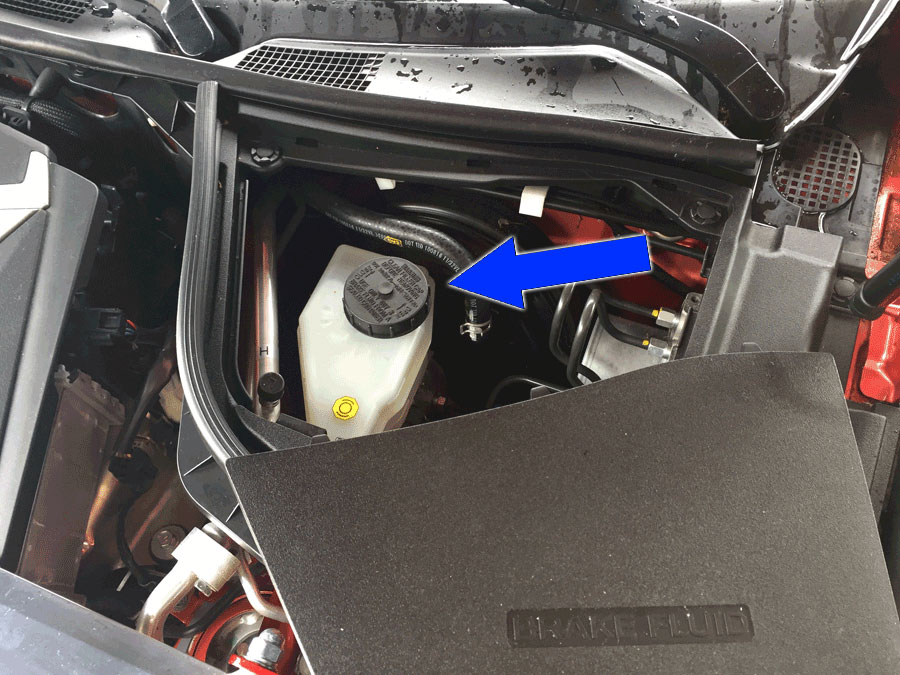 |
Step 1. Open the hood and remove the panel on the drivers side marked "Brake Fluid". Under the panel you should see the brake fluid reservoir and will need to remove the
top or replacing the pads will be a tad more difficult. You should not have an overflow issue during this process but monitor the brake level regardless
|
||
| Step 2. Start by jacking up the whole car, front or back of the car, or each corner as you work on them. When you remove a wheel make sure you put a couple of lug nuts back on to keep the rotor
held in place (they are usually stuck anyway). |
|||
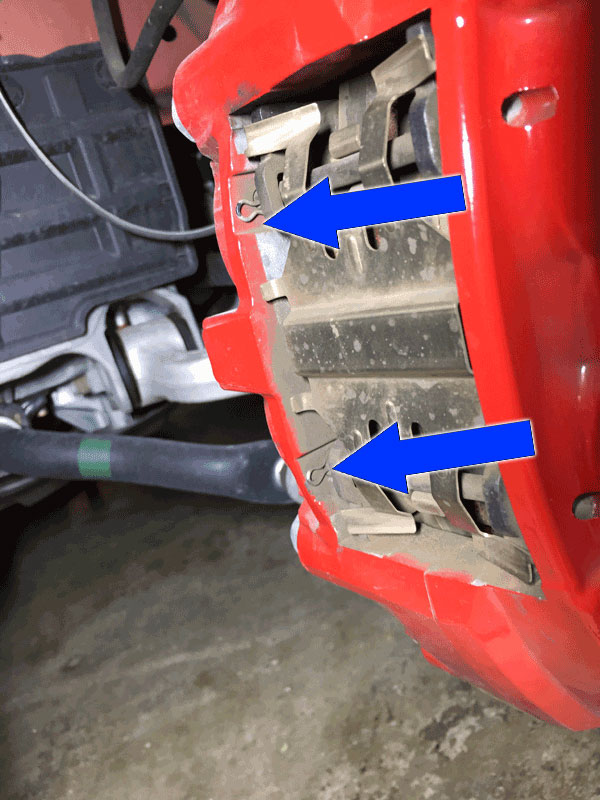 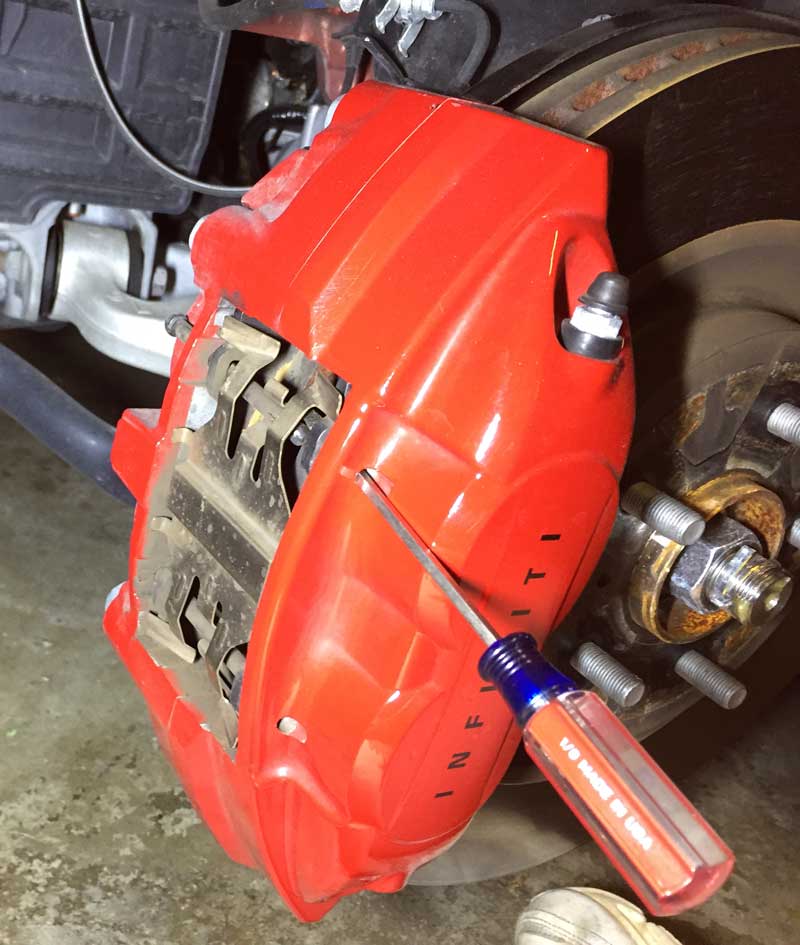 |
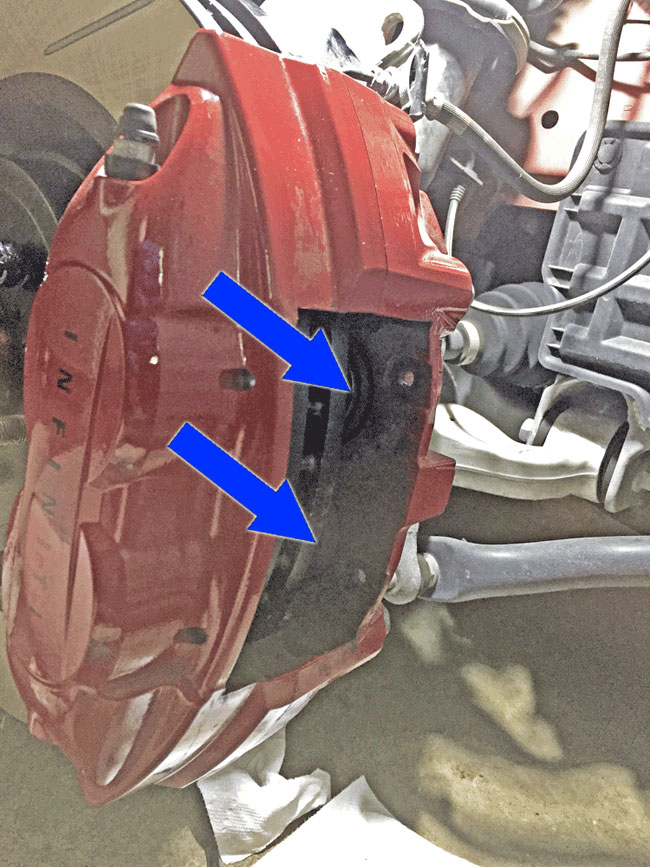
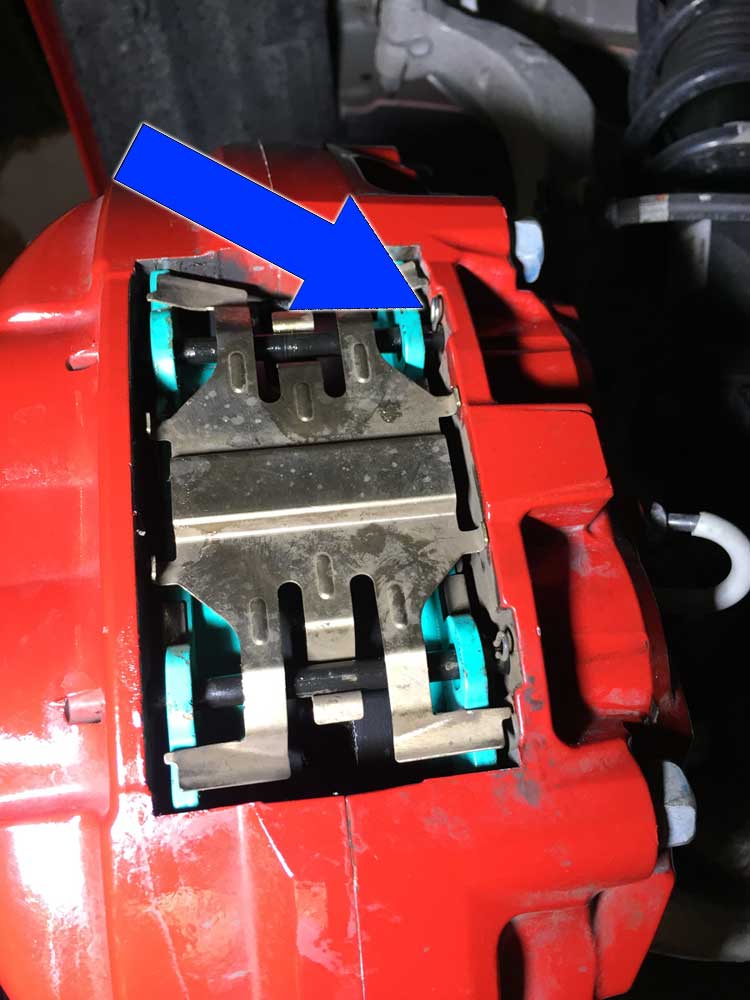
Step 3. Remove the locking Cotter pin from each of the two pad pins as indicated by the blue arrows and set aside (top image to left). Using a small screwdriver, push each pin until
you can grab the inner head and remove (lower image to left). Once both pins are removed the metal Cross Spring can be removed and set aside.
Note: Vehicles with high miles can have buildup on the pad pins which can make removal difficult (as can pin pressure from the Cross Spring). Patience is key and you can use some brake cleaner as well. If you have high miles on the vehicle you may want to order new pad pins to make re-installation easier, otherwise, a wire brush, some lubricant, and elbow grease should get the pins back in shape for easy installation. |
||
 |
Step 4. Remove both old brake pads. They might slide straight out from the caliper if using pliars, but, may need some persuasion by utilizing a flat-head screwdriver as a pry bar to push the brake piston in enough for extraction. Be careful not to gouge the rotor. | ||
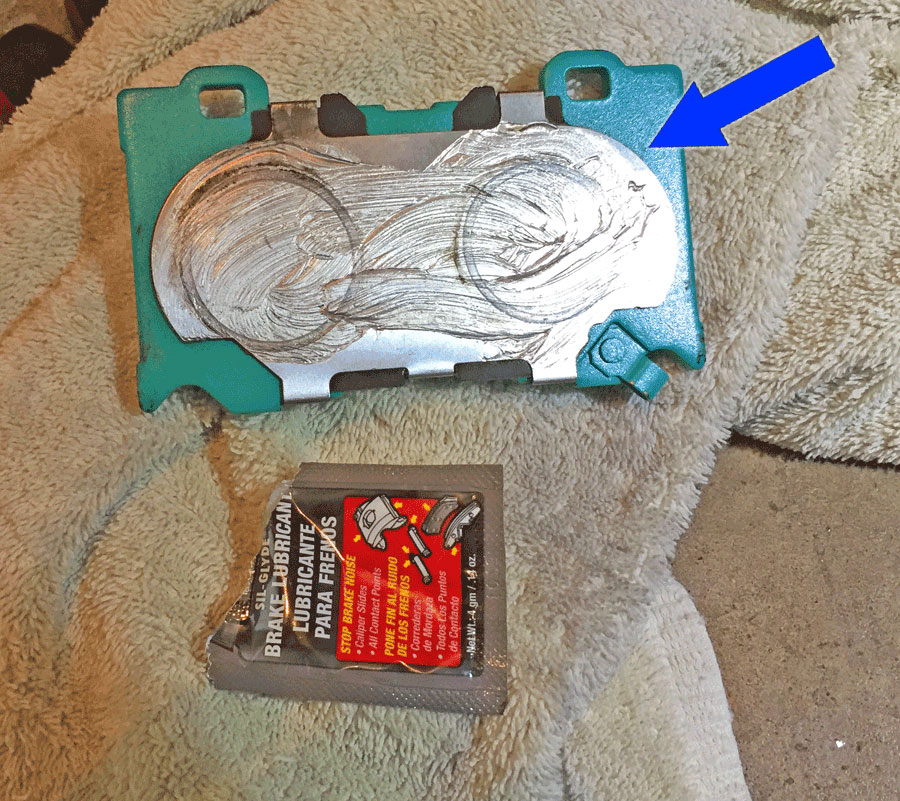 |
Step 5. Prepare the new pads for installation. The old pads will have 2-piece shims which need to be removed. Clean the front and back of each shim and install them onto the new brake pads by first putting a thin coating of brake lubricant / anti-squeal on the pad side of the shim and snapping the shim onto the brake pad with the same orientation in which it was removed. Then add another thin coating onto the piston side of the shim as shown | ||
 |
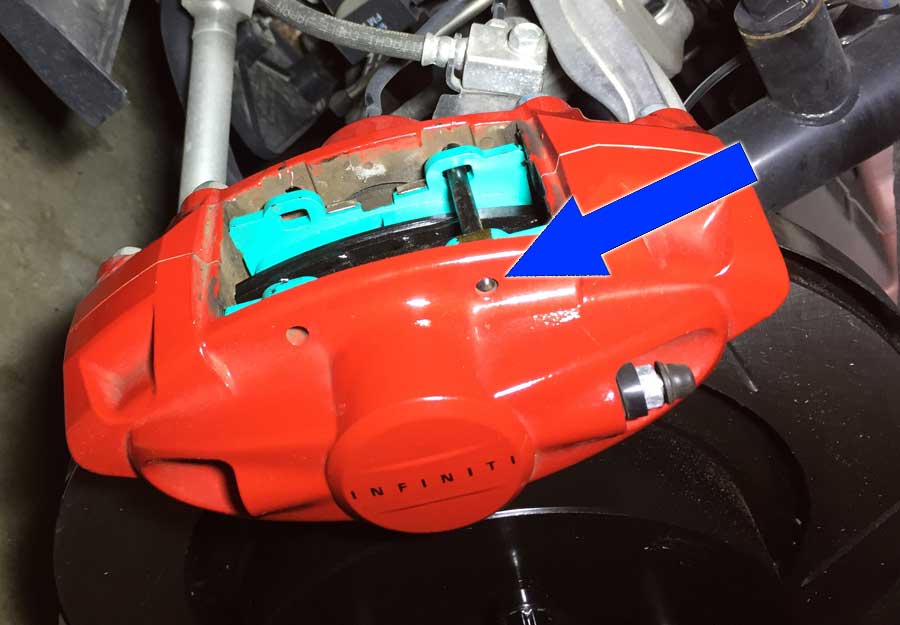
Step 6. In order to make space for the new pads you will need to fully push in the brake pistons. Using a flat head screwdriver, or other flat pry-bar, push against each piston using the
rotor for leverage. You will need to do this multiple times on the front calipers as pushing in one piston will slightly push out the second. Top image shows the back 2 pistons on the front caliper, there are 2 more in the front-side of the rotor. The rear Caliper
only has 1 piston per front/rear to deal with.
Take this time to utilize a small wire brush, with/without brake cleaner, to clean the inside of the caliper where the brake pad travels. |
||
 |
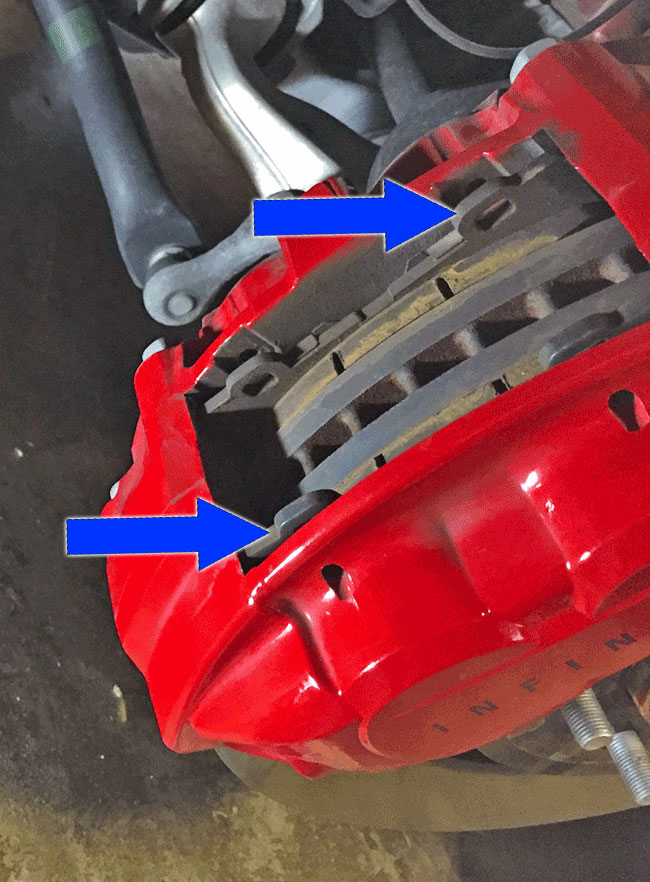
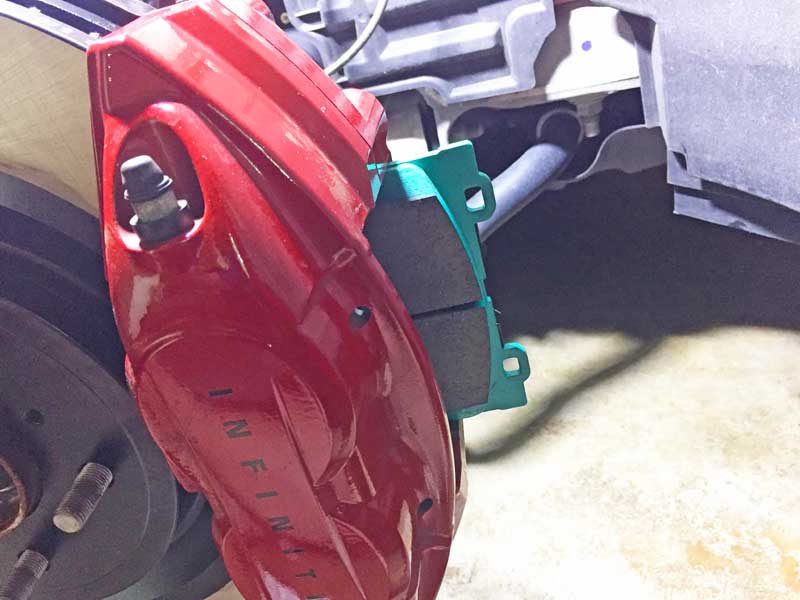
Step 7. Slide the brake pads into the caliper (See top image in this section). This can be tricky in that it's already tight and your new pads may have a layer of paint which makes it
more difficult, but with patience you will be able to get the front and rear pads installed. Some brake lubricant may make it a bit easier. NOTE: If one of your pads in the pair have a wear sensor (metal arm off the bottom/side of the pad) then that pad should
be installed in the back.
To save a bit of frustration via the last step I suggest spending time getting the brake pads aligned prior to final installation of the cross spring. Make sure the pad pins are able to be fully inserted (See lower image in this section). |
||
 |
Step 8. Prior to final installation I suggest coating the pad pin with some of the brake lubricant as installation goes much easier. Put the cross spring in place and slide in one of the pad pins, making sure it goes over the cross sping clip. Do the same for the other pad pin and, finally, install the two Cotter pin retainers. | ||
| REAR BRAKES. Rear pads are installed following the same steps above. The only difference is that the rear caliper only has one piston per side instead of two, thus, less brake pistons to push in. | |||
| Brake Fluid Reservoir. When done with the steps above you need to first reinstall the cap over the reservoir. Crank the car and depress the brakes a few times. The first time you press the pedal it will be loose until the pistons are against the pads. Afterward you will have proper brake feel. Now, check the brake fluid line make sure the brake fluid is not past the "maximum" line. If it is, remove some fluid. If it's not, make sure it's not under the "minimum" line. If it is, fill it backup up. | |||
Disclaimer: The author will not be held responsible nor to be held liable for any damages due to these instructions. Anyone following these directions are doing so at their own risk. This Documentation may not be distributed without the authors consent. |
|||